
I was very fortunate to receive a Fitbit Sense Smart Watch this Christmas. I was intrigued by the ability to customise it, write apps and so on (as I normally am!). I spent a little time looking for a Mickey Mouse watch face, similar to the one available on Apple Watch, but there wasn’t one. There was talk on the forums of one that did exist by was taken down from the store because of IP.
I thought I’d have a go a creating my own one, for personal use, and share how I got on.
I started off looking at some videos on the Apple Watch face and some similar ones created for Google’s Wear OS.
For my version 1, I wanted to keep it simple and not have fancy animations (that’s version 2!). To get started, I wanted to find image assets that would be perfect for creating the watch face. I came across a WearOS face that have been shared on the XDA forum (which is pretty ace forum if you’re into customising phones, loading your own versions of Android etc.). In this post, user MartyMcFly68, had shared a link to a .apk file which was the WearOS version of a Mickey Mouse watch face.
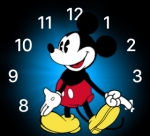
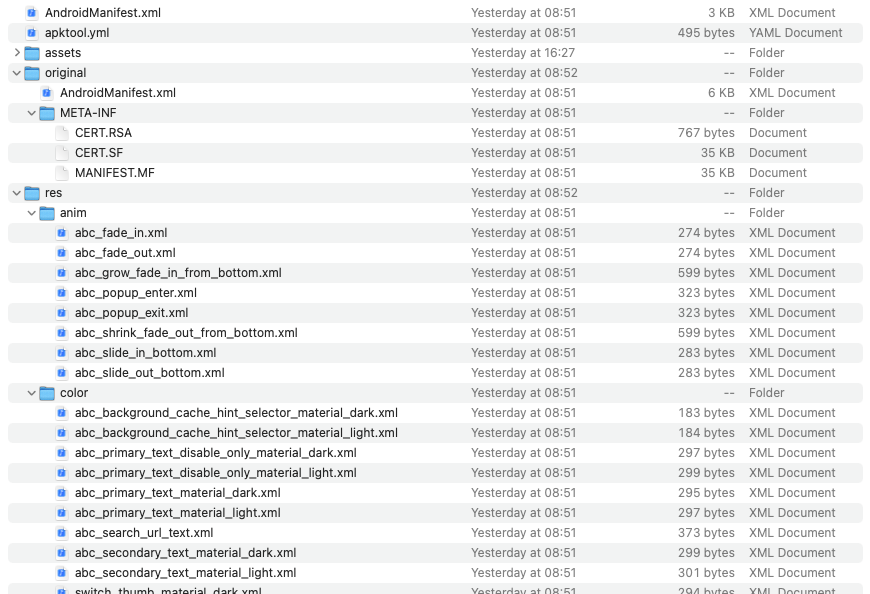
I downloaded this, and then used APKtool, to decompile the APK to view the assets, XML and other data that could be useful to create a watch face for my FitBit Sense. From this APK, I was able to locate all the graphics to match the style of the Apple Watch face that I was looking to emulate (in part!).
FitBit Apps are developed using CSS, JavaScript and SVG markup. FitBit have a Fitbit OS Simulator that can be installed for testing and a developer tool is available at FitBit Studio (https://studio.fitbit.com/projects) and is exceptionally easy to use.
I started by layering the images to create the character but ran into some problems with images not displaying correctly. I discovered that the images that I had obtained from the .apk file where saved as PNGs but with reduced pallets. This meant they didn’t display as expected. So, I loaded these into Adobe Photoshop, changed the image mode to RGB and saved them. First problem fixed!
I then worked out that to place and animate images, I had to use the G container within the SVG markup I was using. This container allows translations (move), rotate and scale on the elements held within it.
To create the 0.5 version watchface, I used some example code from the FitBit forums (where I found all the answers I was looking for through this project). I had to do some tinkering to get my images to animate correctly and I added a red line (made in Photoshop) as the second hand.
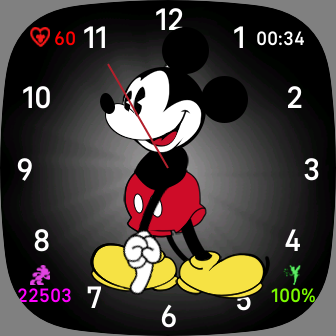
Then to finish off, I added a digital clock display, a step counter, a heart rate monitor and battery monitor. I found sample code in the reference section of the FitBit developer documentation.
I used this to generate a watch face that updates each second with the current time, steps, heart rate and battery level. This was a fun little project for today and I might try adding some animation next.
Here is a video of the working watchface and the export file for it can be downloaded here -> MouseFace2-export.
app/index.js
import clock from "clock";
import document from "document";
import { preferences } from "user-settings";
import * as util from "../common/utils";
import { HeartRateSensor } from "heart-rate";
import { me as appbit } from "appbit";
import { today } from "user-activity";
import { battery } from "power";

//setup days of the week
const dayLabel = document.getElementById("dayLabel");
const days = ["SUN", "MON", "TUE", "WED", "THU", "FRI", "SAT"];


// Keep a timestamp of the last reading received. Start when the app is started.
let lastValueTimestamp = Date.now();

// Create a new instance of the HeartRateSensor object
if (HeartRateSensor) {
   const hrm = new HeartRateSensor();
   const myhrm = document.getElementById("myhrm");
   hrm.addEventListener("reading", () => {
     myhrm.text = `${hrm.heartRate}`;
   });
   hrm.start();
} else {
   console.log("This device does NOT have a HeartRateSensor!");
}

// Update the clock every minute
clock.granularity = "seconds";
// Get a handle on the <text> element
const myLabel = document.getElementById("myLabel");
// Update the <text> element every tick with the current time
clock.ontick = (evt) => {
  let today1 = evt.date;
  let hours = today1.getHours();
  if (preferences.clockDisplay === "12h") {
    // 12h format
    hours = hours % 12 || 12;
  } else {
    // 24h format
    hours = util.zeroPad(hours);
  }
  let mins = util.zeroPad(today1.getMinutes());
  /*let secs = util.zeroPad(today.getSeconds());*/
  myLabel.text = `${hours}:${mins}`;
  if (appbit.permissions.granted("access_activity")) {
   const mysteps = document.getElementById("mysteps");
   mysteps.text=`${today.adjusted.steps}`;
   console.log(`${today.adjusted.steps}`);
   /*  if (today.local.elevationGain !== undefined) {
     console.log(`${today.adjusted.elevationGain} Floor(s)`);
   }*/
  }
  const mybatt = document.getElementById("mybatt");
  mybatt.text = `${Math.floor(battery.chargeLevel)}` + "%";
  let dayName = days[today1.getDay()];
  dayLabel.text = dayName;
}
resources/index.view
<svg class="background">
    <image href="bg_320.png"  />
    <image class="mbody" href="body_320.png" />
    <g transform="translate(50%,50%)"><text x="-13" y="-138" class="clockfacetext">12</text></g>
    <g transform="translate(50%,50%)"><text x="-152" y="12" class="clockfacetext">9</text></g>
    <g transform="translate(50%,50%)"><text x="135" y="12" class="clockfacetext">3</text></g>
    <g transform="translate(50%,50%)"><text x="-8" y="159" class="clockfacetext">6</text></g>
    <g transform="translate(50%,50%)"><text x="-146" y="-60" class="clockfacetext">10</text></g>
    <g transform="translate(50%,50%)"><text x="118" y="-60" class="clockfacetext">2</text></g>
    <g transform="translate(50%,50%)"><text x="-135" y="83" class="clockfacetext">8</text></g>
    <g transform="translate(50%,50%)"><text x="116" y="83" class="clockfacetext">4</text></g>
    <g transform="translate(50%,50%)"><text x="67" y="142" class="clockfacetext">5</text></g>
    <g transform="translate(50%,50%)"><text x="-82" y="140" class="clockfacetext">7</text></g>
    <g transform="translate(50%,50%)"><text x="-85" y="-120" class="clockfacetext">11</text></g>
    <g transform="translate(50%,50%)"><text x="65" y="-120" class="clockfacetext">1</text></g>
    <image width="91" height="50" x="175" y="250" href="shoe01_320.png" />
  <defs>
    <symbol id="clock-widget" class="clock-widget" type="clock-widget" focusable="false" pointer-events="visible"
    system-events="all" x="0" y="0" width="100%" height="100%" data-size="16" />
  </defs>
  <!-- clock widget -->
  <use id="analog-watch-hands" href="#clock-widget">
    <!-- clock background -->

    <!-- clock hands -->
    <g transform="translate(50%,50%)">
      <g  id="hour-hand">
        <image x="$-40" y="$-114" width="50" height="114" fill="white" href="hand_hour_320.png"  />
      </g>
    </g>
    <g >
      <g>
          <image x="100" y="27" class="mhead1" width="148" height="128" href="head_320.png" fill="white" />
      </g>
      <g >
         <image x="123" y="86" width="23" height="31" class="meyes1" href="eyes01_320.png" fill="white"/>
      </g>
    </g>
     <g  transform="translate(50%,50%)">
      <g id="minute-hand">
        <image x="$-31" y="$-130" width="41" height="130" href="hand_minute_320_1.png" fill="white" />
      </g>
    </g>
    <g  transform="translate(50%,50%)">
      <g id="second-hand">
        <image x="$-1" y="$-120" width="2" height="120" href="seconds.png" fill="white" />
      </g>
    </g>
  </use>
  <text x="280" y="45" id="myLabel" />
  <image x="30" y="27" href="ico_active.png" height="20" width="20" fill="red"/>
  <text id="myhrm" x="65" y="45" >42</text>
  <image x="30" y="265" href="ico_steps.png" height="20" width="20" fill="purple"/>
  <text id="mysteps" x="44" y="302">42</text>
  <image x="282" y="265" href="ico_batt.png" height="20" width="20" fill="lawngreen"/>
  <text id="mybatt" x="293" y="302">42</text>
</svg>
Nathan Wheeler
This is amazing! Thank you for such a detailed example. I’m very new to this type of programming and excited to learn. I have done some work with Watchmaker and, since purchasing a Versa 3, some clock faces with fitface.xyz. I have gone through a back and forth debate as to paying the annual fee for fitface.xyz. However after finding you article and example, well it seems this is a much better option to designing watch faces for my Versa 3.
Can’t wait to see your version 2 Mickey design!!
Nathan
I saw a YouTuber with a digital Mickey watch face on their smartwatch and wondered where they go it. Now I see that it must have been an Apple Watch. How can I install the face you created on my FitBit? Thanks in advance!
Darrin Chapman
Thank you for this. I installed it without issue. I did notice my battery draining faster. I uninstalled and factory reset my watch (sense) and I’m giving it another shot.
Philip
Can this be done with a Minnie mouse pic?
Nathan Wheeler
Love your example. Was wondering if you have finished version 2 or is the animation for Mickey’s face and foot tap done with similar code as the watch hands movements?
Also, I’m using fitbit studio with a chromebook and can’t drag and drop the image file into the resources area. Any ideas as to why this might be not working? The other parts of the watch can drag and drop just fine.
Thanks again for your example. I am looking forward to creating some watches with fitbit studio for the fitbit sense watch.
Charlie Love
Yes, would need to do the same process of creating the image elements and then animating with the script.